
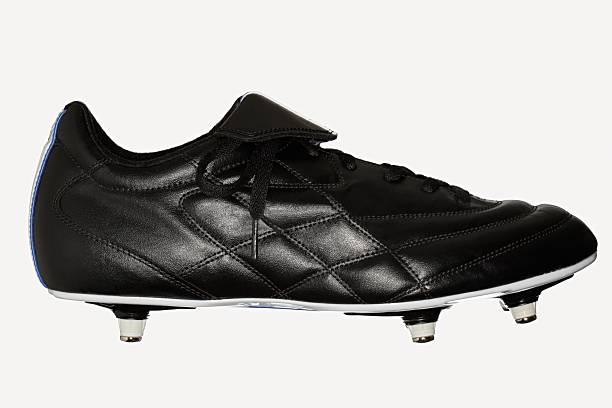
You just got a brand-new pair of soccer cleats, and you’re dying to get on the pitch. Well, there’s just one little problem: they’re stiff as boards, super uncomfortable, and appear to be designed to punish your poor feet rather than help you score goals.
But don’t sweat it-we’ve all been there.
Breaking in new soccer cleats is no fun, but with the right techniques, you’ll have those things game-ready before you know it. In this post, we are going to cover everything you need to know about how to break in new soccer cleats quickly, comfortably, and effectively.
Why Breaking in Soccer Cleats is Important
First, let me talk about why it’s so important for you to break in your new cleats. Soccer cleats are designed to give you the best performance you can have out on the field. They’re built for speed, agility, and control. But fresh out of the box, they can be stiff and uncomfortable.
The materials-whether it’s synthetic, leather, or a combination-need to mold to the shape of your feet to provide the right fit.
Jumping straight into the game without going through the break-in process will almost definitely result in the development of blisters, sore feet, and even rolled ankles, among other injuries, due to the stiffness of the cleats.
A well-broken-in pair of cleats will:
- Fit comfortably and snugly onto your foot
- Give you full control over the ball
- Offer great ground traction and stability
- Decrease the occurrence of hotspots and blisters
- Improve overall performance
Now that we’ve already given the reasons why breaking in your cleats is important, let’s talk about how you are able to do this effectively and in the shortest time possible.
CHECK OUT | Fun Soccer Drills for 5-Year-Olds: The Ultimate Guide
Step 1: Choose the Right Size
But before we go into how to break in your cleats, let’s take a look at something more basic: the fit. Your cleats need to fit correctly; otherwise all efforts to break them in cannot make them comfortable.
Here is what you need to pay attention to when choosing a size:
Length: Your toes should be in a position where they have just a bit of wiggle room, but no more. You want about a thumbnail’s width between your longest toe and the end of the cleat.
Width: The fit of your cleats should be such that your feet are snug but not so tight that it pinches or squeezes them. Remember, leather cleats will generally stretch slightly overtime, while synthetic materials usually won’t give as much.
Arch Support: While some cleats have arch support built in, for those that need extra cushioning, consider insoles offering support your feet will appreciate.
When you have the right size, you are ready to start the break-in process.
Step 2: Wear Them Around the House
The easiest and least risky way to break in your cleats is to wear them around the house.
And here is why it works:
Minimal pressure on your feet: You are walking on a level, smooth surface inside the confines of your house; this accommodates your feet in the new pairs without extra pressure from running and pivoting on the field.
Gradual flexing: With every step, the cleat materials start softening and molding to the shape of your foot, with particular areas not bearing too much pressure, unlike during a game action.
Blister Prevention: The low-intensity environment allows your body to get used to any hot spots, areas that are likely to provide blisters from friction, and lets you take care of them before it’s too late.
To accomplish this, wear them in spurts of 20-30 minutes for a couple of days.
You can wear these while doing chores, watching TV, and even just being up and about. Wear thick socks with them for added cushioning of the feet to help accelerate the breaking-in process.
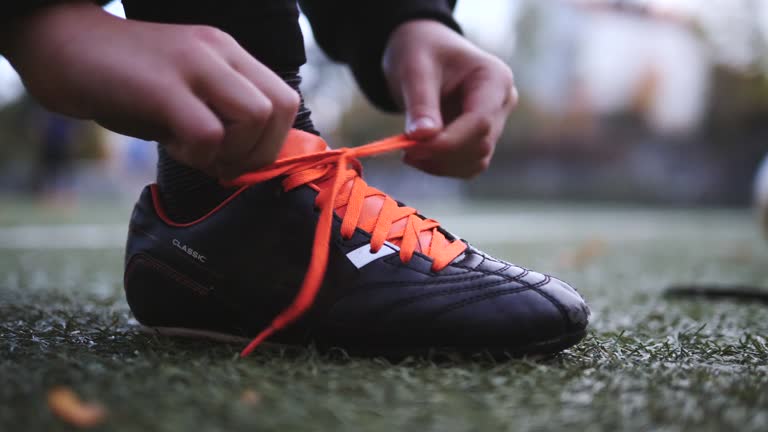
Step 3: Wearing Thick or Double Socks
Begin to put your cleats on, out in the field, with thicker socks, or the doubling of your regular socks. Thick socks serve as an added padding which helps:
- Protect the feet from rubbing and blistering;
- Stretch the cleat material a little bit sooner;
- Allow it to fit tighter once you go back into regular soccer socks.
Especially helpful for leather cleats, this method can easily stretch during consistent use. Just beware of over-stretching. Wear several sessions of these thicker socks, then go back to your usual socks to check the better fit.
Step 4: Quicker Break-In Trick Using Moisture and Heat
There are a couple of “old-school” tricks that speed up the break-in process, one of which is the method of using moisture and heat.
Here’s how it goes:
Moisturize the inside of your cleats: Take a towel and dip it in warm water. Stuff this inside your cleats for about 10-15 minutes. The dampness will help soften the material, making it more yielding. You don’t want to soak them, but just a little dampness will suffice.
Wear Them Right After: When the cleats are a little more flexible, wear them, keeping them on for another 20-30 minutes. The combination of the warmed, softened material with movement of the feet will help the cleats adjust to your foot shape.
Hit with a Hairdryer on Low: Another method could be to use a hairdryer on a low setting. Once you have dampened the cleats, proceed with the use of the dryer to enable the application of gentle heat while flexing the shoe.
Just be wary not to overheat them too much, since high heat may affect synthetic materials or adhesives that could be used in putting the cleat together.
This works great with leather cleats but does help a little with synthetics, too. Always be careful not to apply too much heat or moisture, which can warp your cleat or reduce its durability.
CHECK OUT | Can You Wear Running Shoes for Soccer?
Step 5: Conditioning Leather Cleats
If you’ve chosen leather cleats, then you’ll need to give them a little more love. Leather is softer, molding better with time to your feet; however, it does require regular maintenance to make sure it remains supple and flexible.
Here’s how to condition your leather cleats:
Conditioning the Leather: Apply a leather conditioner or cream after a few initial wears of your soccer cleats. This will prevent it from cracking and keep the material soft and supple. You can check at most sporting goods stores for a leather conditioner.
Avoid Over-Wetting: While leather is more supple when moist, overexposure to water may cause loss of form. Always air-dry your cleats and avoid placing them in the direct sun or in the vicinity of a heater, because this will make the leather dry out and crack.
Regular Cleaning and Conditioning: Clean your leather cleats after each game or practice using a soft cloth and a little bit of warm water. No harsh detergents should be used since these will eventually strip away the leather’s natural oils.
The more TLC for the leather cleats, the quicker it can break in and last longer.
Step 6: Train Lightly Before Full Game
Once you have felt a bit of an improvement in flexibility with your cleats, it’s time to take them onto the field-but not just yet at full scale. You can begin to do light trainings before jumping into a full 90-minute game.
Here’s how:
Warm-up Drills: Do a little jogging, passing drills, and some ball control. This will help your cleats to continue to break in the movements you are working in for game time without putting too much pressure on the feet.
Pressure Points: Use your body as a guide to know where there are hot spots or points of your foot that feel constrained or just plain uncomfortable. If you find one, do stop and take care of it with thicker socks, changes in lacing techniques, or the application of blister pads that help.
Gradually Increase Intensity: As your cleats wear in, increase the intensity of your training. Move into sprints, cuts, and more rigorous drills. By the time you’re ready for a full game, your cleats should be well along their way to being fully broken in.
CHECK OUT | Why Does My Heel Hurt in Soccer?
Step 7: Adjust Your Laces
One of the less well-known but effective ways of making your cleats more comfortable is by adjusting your laces. Several different methods help take pressure off of certain areas in your feet.
Here are a few of the common ways:
Heel-Lock Lacing: If your heels keep slipping inside your cleats, you may want to try the heel-lock. This involves one specific way of lacing, which is tighter around the ankle and thereby keeps the foot in place.
Skipping lacing: If some areas of your foot are feeling too tight, you might want to skip a few lace holes so that a little less pull is exerted on the tight areas. This especially helps if the upper part of the cleat seems too tight.
Looser Forefoot Lacing: Players with extreme pain in their forefoot should quickly try loosening their laces near the toe of the shoe. This will give your toes a bit more room to move around and prevent cramping from happening.
Try different lacing techniques until you find the one that feels right for your foot shape and the type of cleats you are using.
Step 8: Break-In with Regular Use
As much as these tricks and tips can do in hastening the break-in process, the truth is that your cleats will really be molding to your feet with regular use.
After all nothing breaks in soccer cleats quite like playing soccer. The more you wear them during practice sessions, the more comfortable they’ll be.
Just be a little careful with your ramp-up pace.
Don’t immediately wear new cleats for entire games. Break them in by using them in practice and during shorter matches. This will give your feet, as well as the cleats, time to adjust and prevent blisters or discomfort.
Step 9: Keep Your Feet Healthy
Breaking in your cleats is as much about taking care of your shoes as it is taking care of your feet. Proper foot care can go a long way in making your cleats feel comfortable as they break in. A few foot care tips to remember include:
Keep Your Feet Dry: One of the leading causes of blisters is moistened skin. Keeping your feet dry during play, wear moisture-wicking socks, and sprinkle some foot powder to reduce perspiration.
Taping the Hotspots: If you have known areas that blister easily-your heel or toe for example-take the time to put blister pads or athletic tape on those parts before putting on your cleats.
Rest and Recover: When your feet are sore from a session, give them some rest. You can soak your feet in warm water with Epsom salts added to reduce the swelling and soreness of the feet.